KiPad: Yet another custom built keyboard, but it's a numpad
I like using the numpad. But what if the numpad was a hexadecimal numpad? Like, it has 0 to 9, as well as A to F. I mean, I type out lots of hex (numbers, not like spells), especially when I'm deep into reversing binaries. Why not?
And then I saw this:
Now I gotta build one, right? And make it customizable?
This post might be short on the technicals, just wanted to share a project I did and some of the 'techniques' I used. Maybe you can find some of this useful.
There are LOTS of guides out there for building your own keyboard and customizing it. Actually, when someone comes up to me to ask about getting into hardware designs, I usually recommend building their own keyboard for that reason; it's not super complex, there are tons of videos and tutorials, and I think it covers a good range of the process: the component selection, hardware design (including schematics and PCB design), having your design sent out to a fab, and working on firmware.
Version 1
The first version of this project actually happened during COVID-19 era. It was just a quick design; there was no case, it had some standoffs screwed to the back so it's angled, and mistakes on the PCB were "hotfixed" by cutting traces and soldering wires across.
I also didn't have the proper key layout when I took this photo:
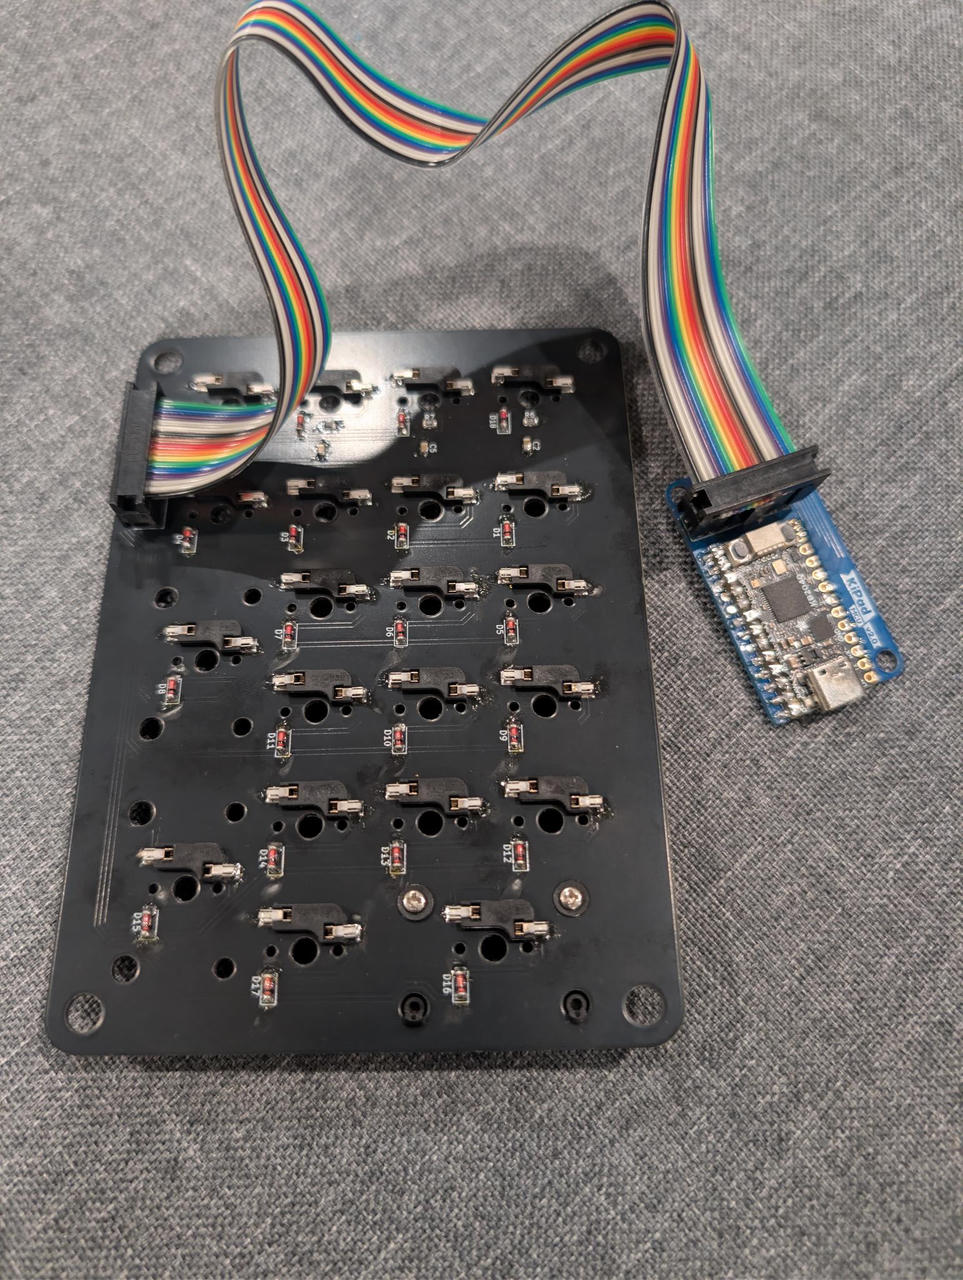
Version 2
That version 1 sat on my desk for about two years when I decided to build a new version for it.
It was re-designed basically from scratch. Some of the changes were:
- I used hot-swappable keyswitch sockets and actually used the proper footprints for the diodes.
- The key layout was also changed. It now resembled a regular numpad, just with an extra row on top.
- Once the key matrix was routed, I couldn't figure out where I could put the microcontroller circuit without it being too bulky. I said, "SCREW IT, WE'LL DO IT LIVE" and just put a pin header on there.
- I wanted to print a case for it.
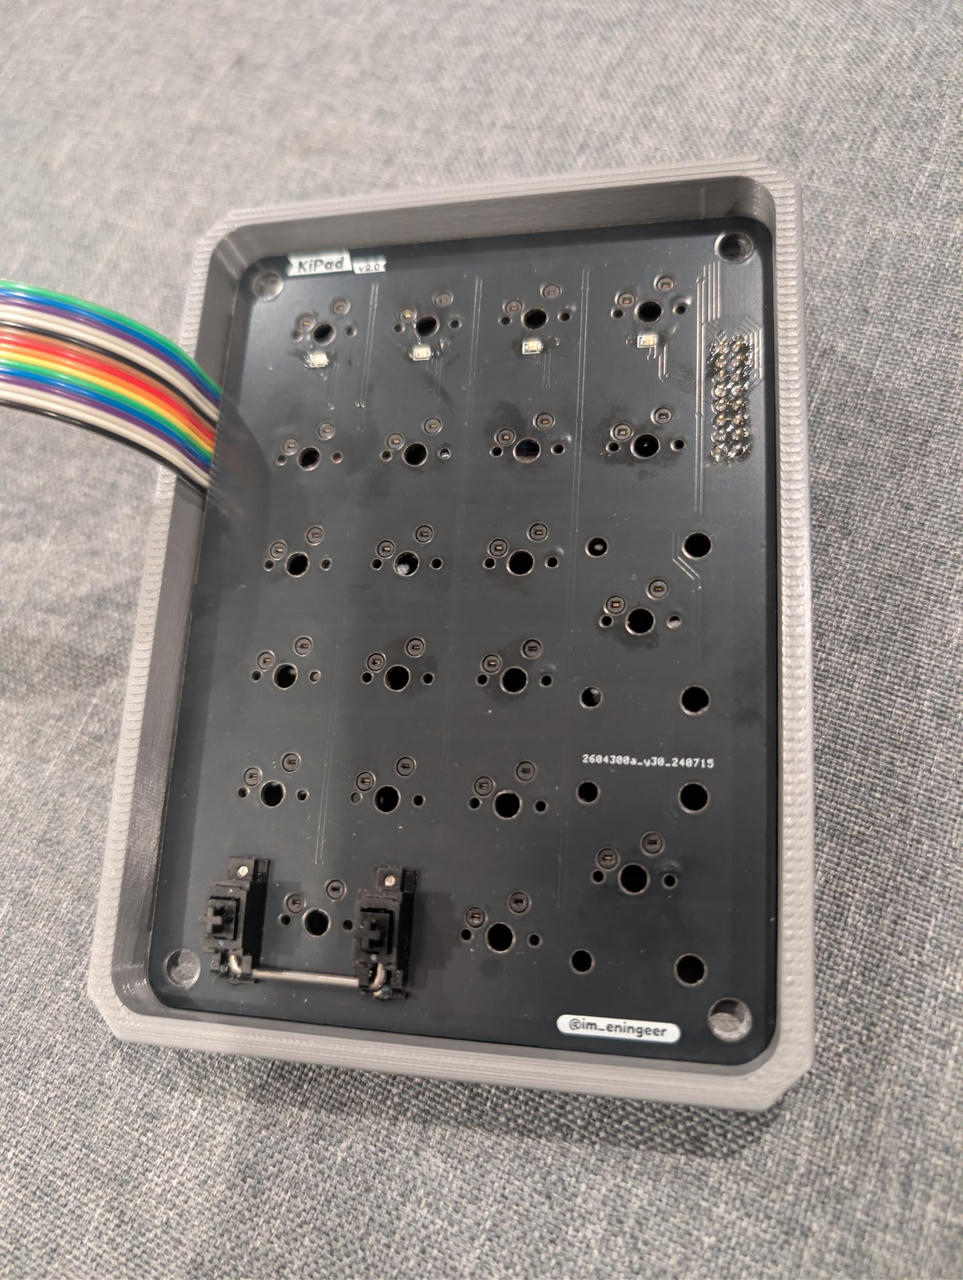
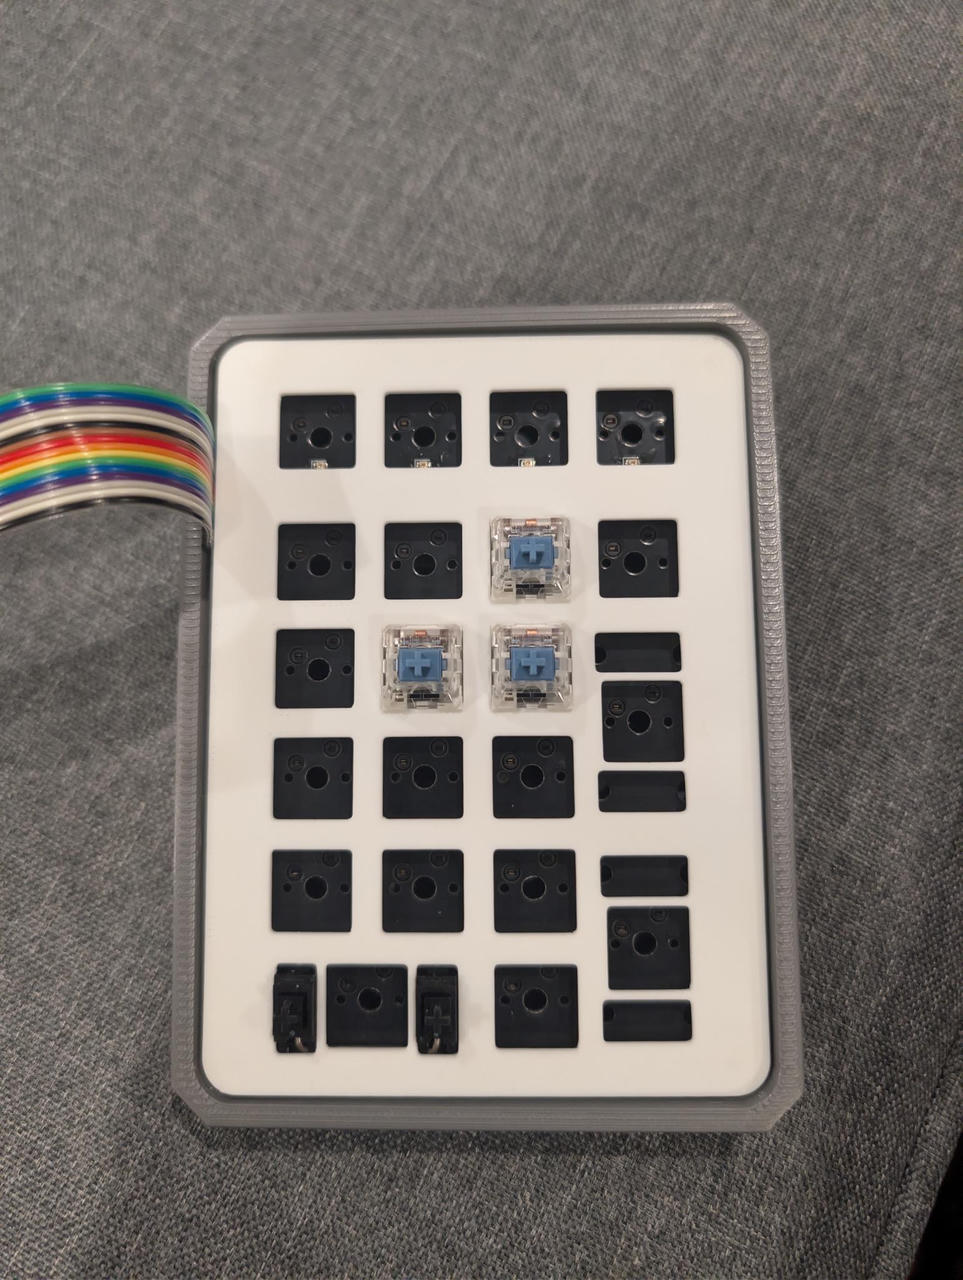
I guess version 2 wasn't meant to be a final thing, just a prototype for me to test things. For the case, I had the idea to print a lifted, angled base which the PCB will sit on top of. Additionally, a plate that the key switches can sit/snap onto.
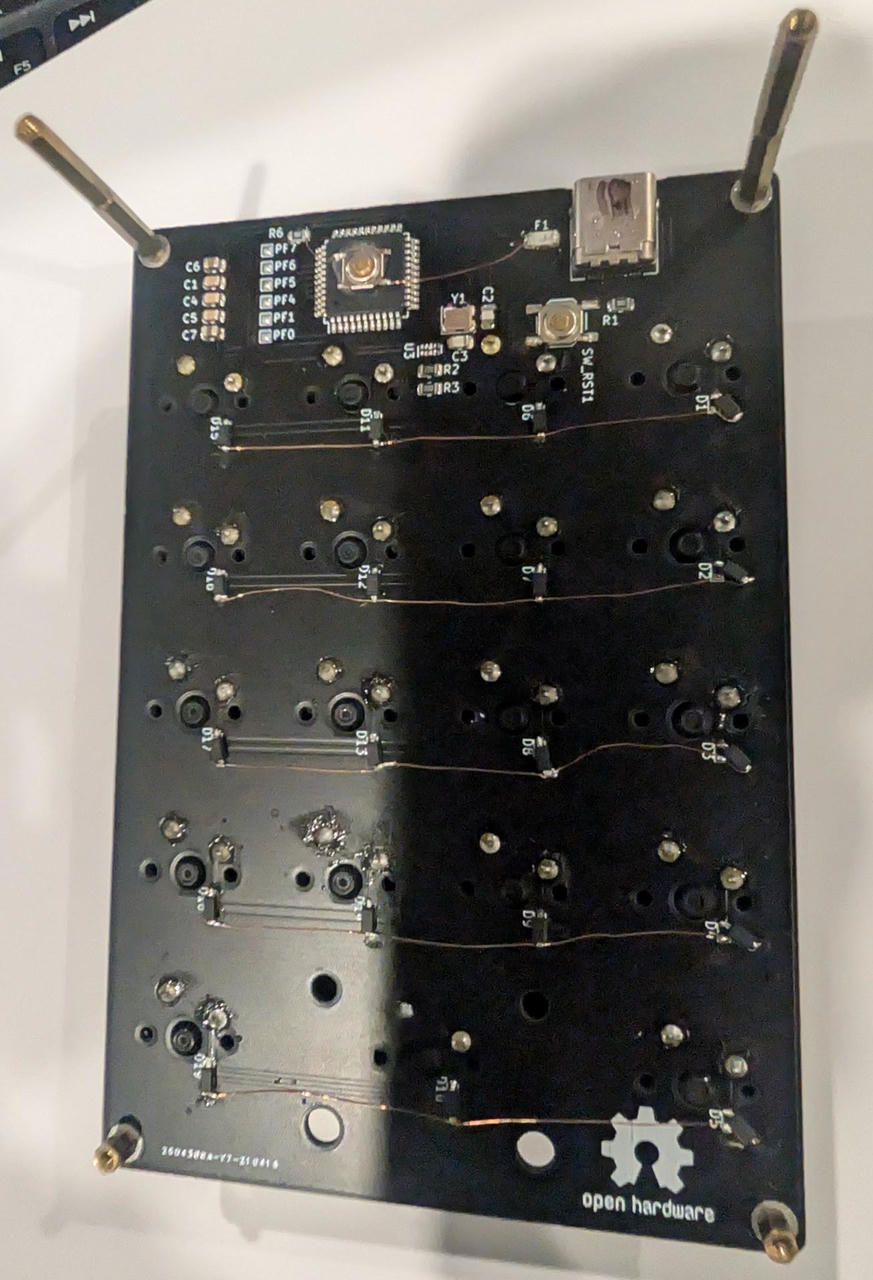
The base:
The PCB:
And this was what I had in mind:
The issues I've identified with this designs:
- Obviously, the microcontroller. The keypad shouldn't have a rainbow cable coming OUT of the case.
- It felt too... big. Like bulky, for something like this. The holes in the corner added too much gap all the way around.
- The key switch plate was too thin and flimsy. I guess it's fine once the key switches are snapped into it.
- The whole assembly just pops out since there's nothing securing it to the base.
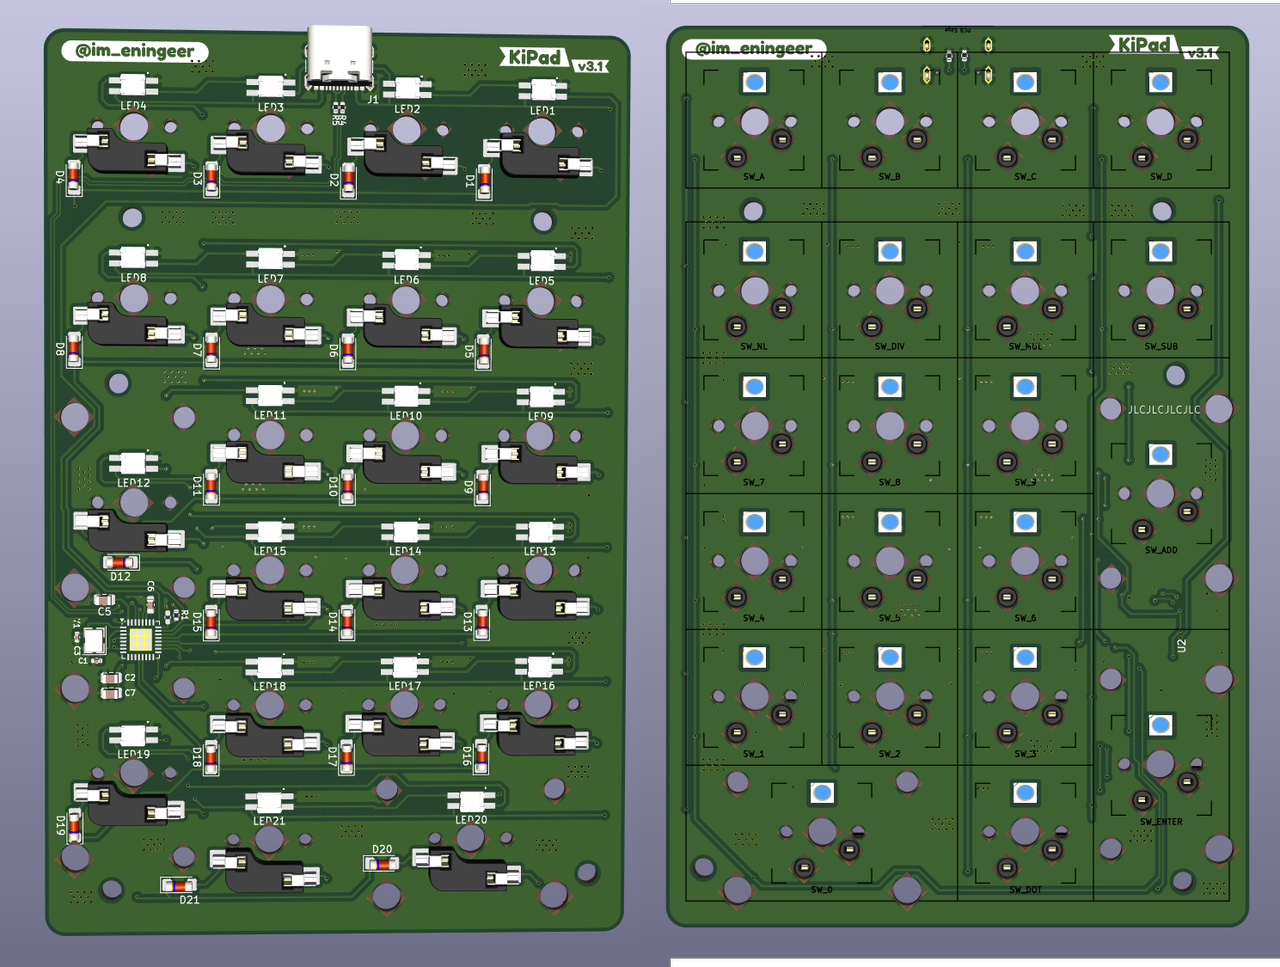
Version 3
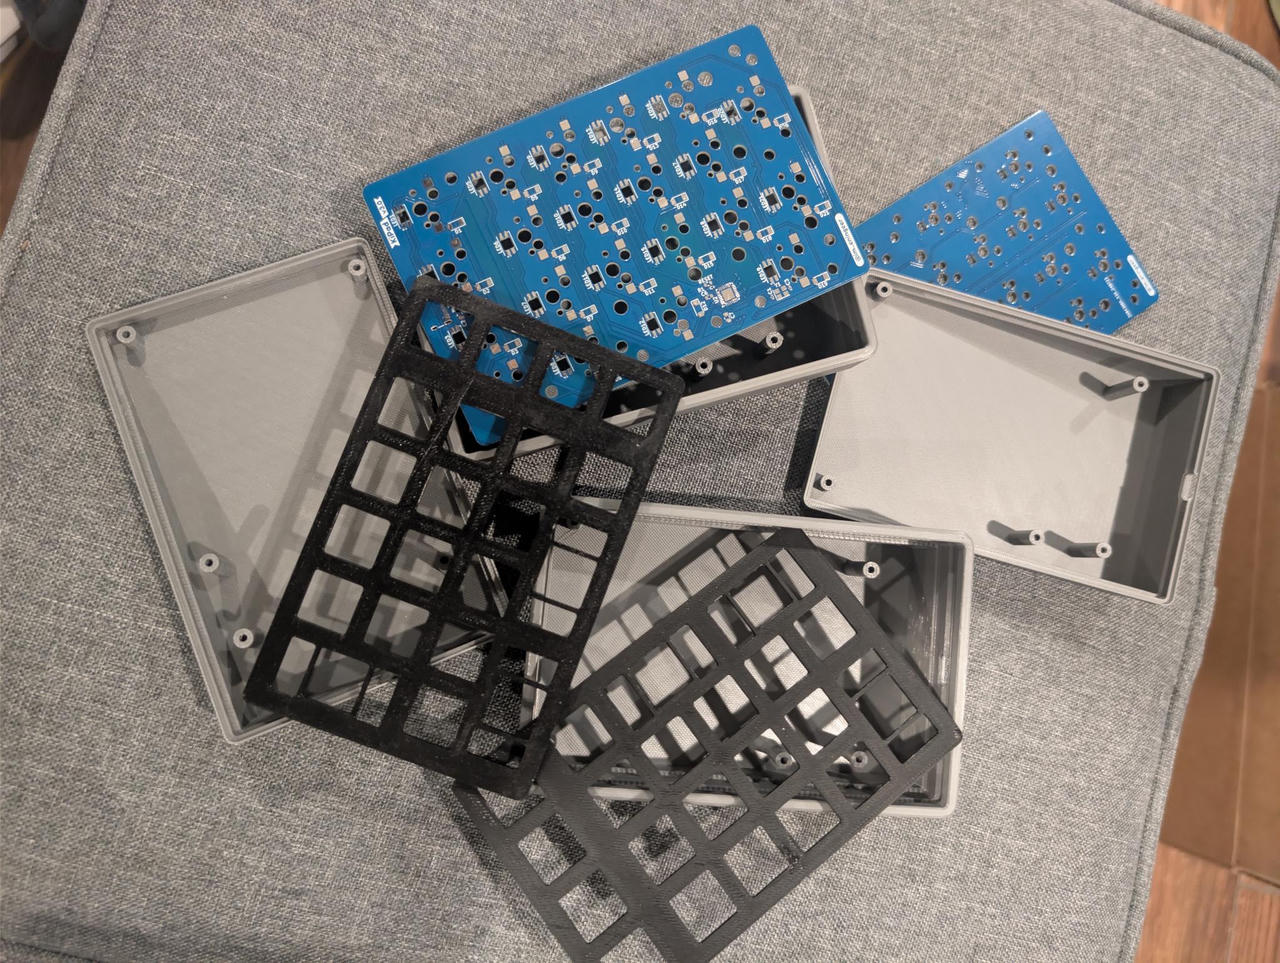
I did some brainstorming and went through some design iterations.
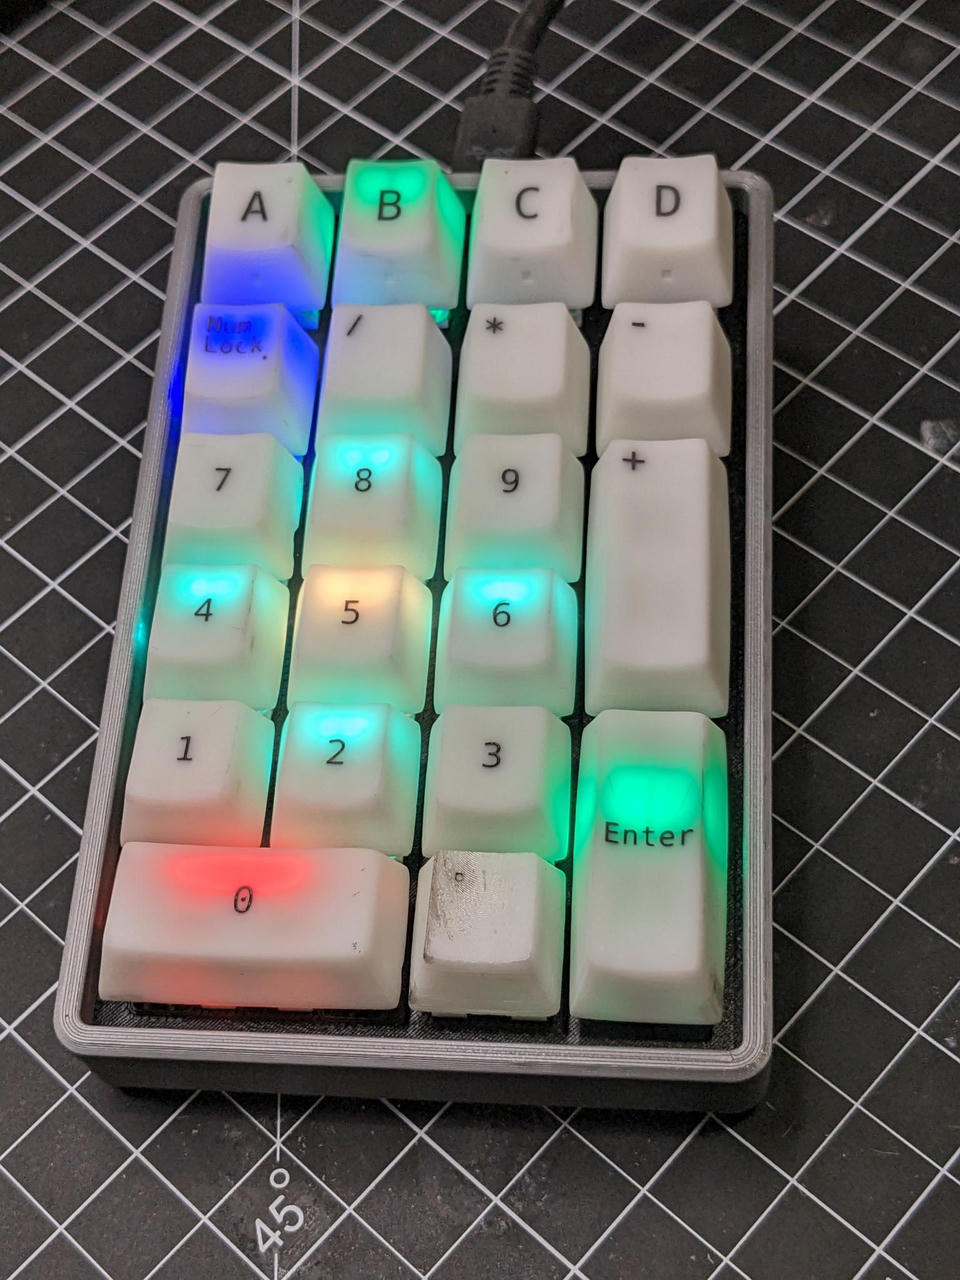
I also wanted each key to have an LED.
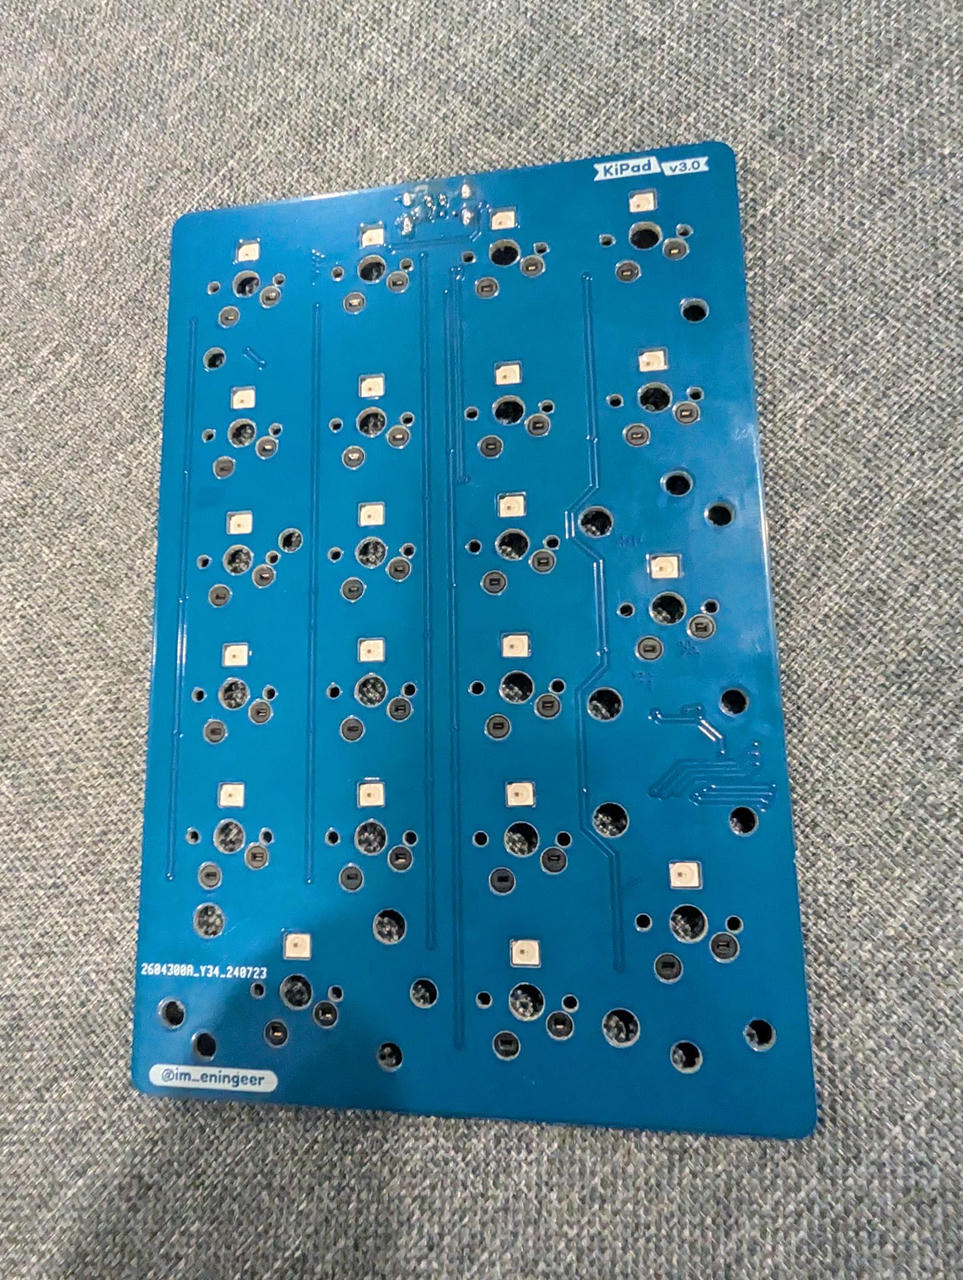
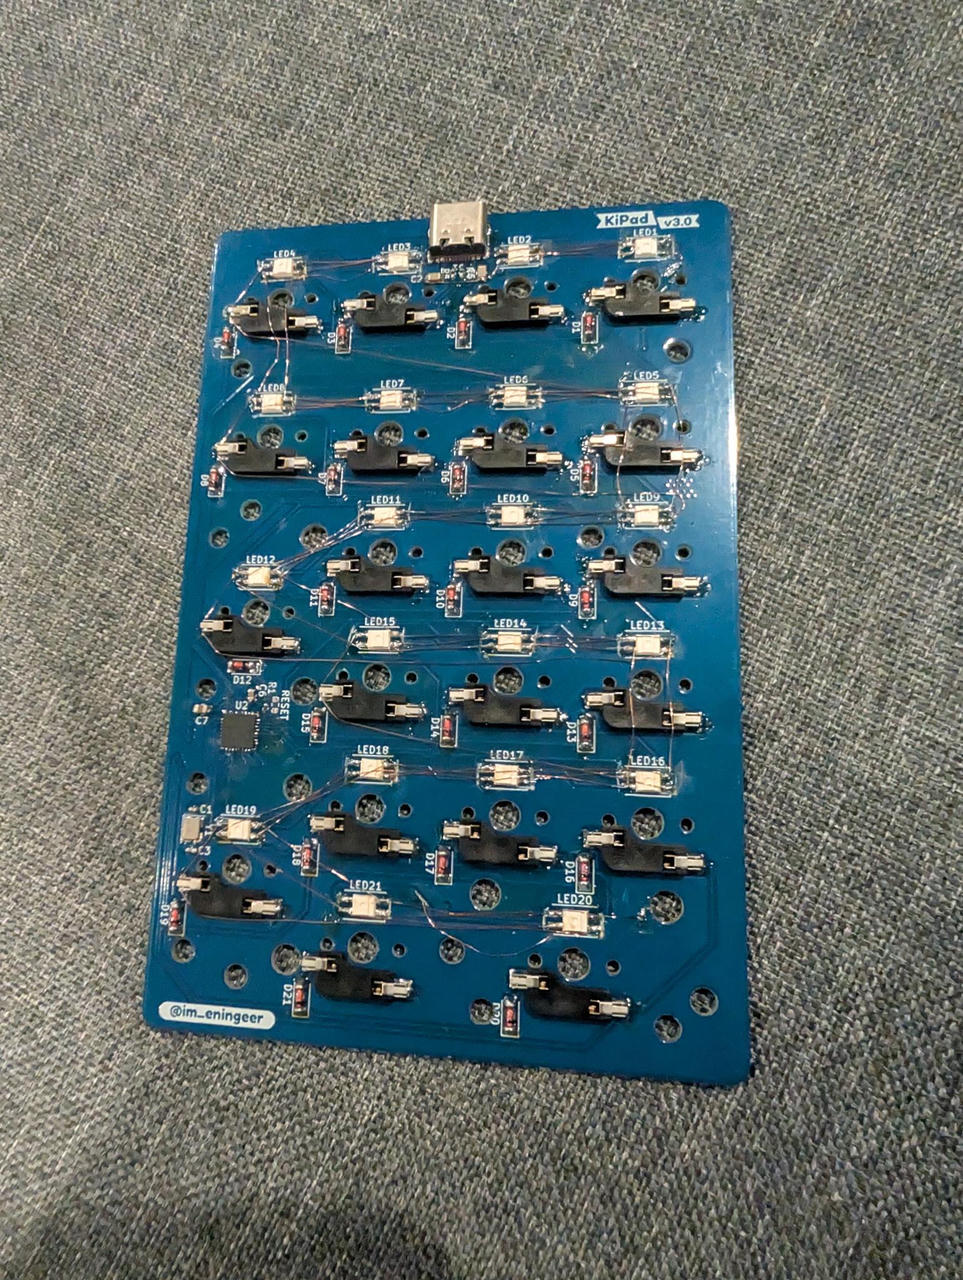
Somehow, I also found some space to fit the microcontroller, despite making the PCB smaller. But of course, I swapped the pins for the LEDs, so I had to cut and re-wire everything manually.
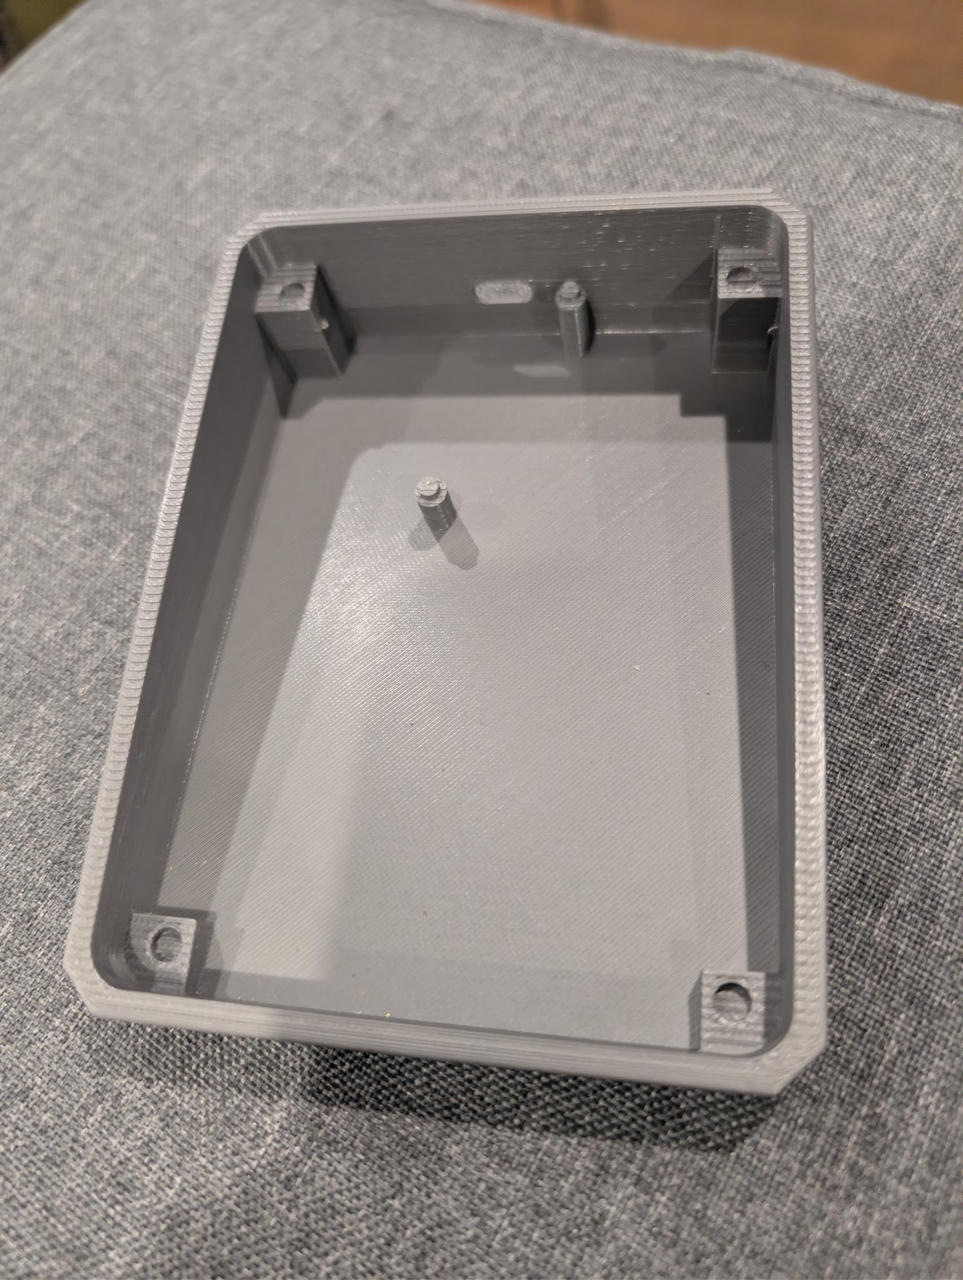
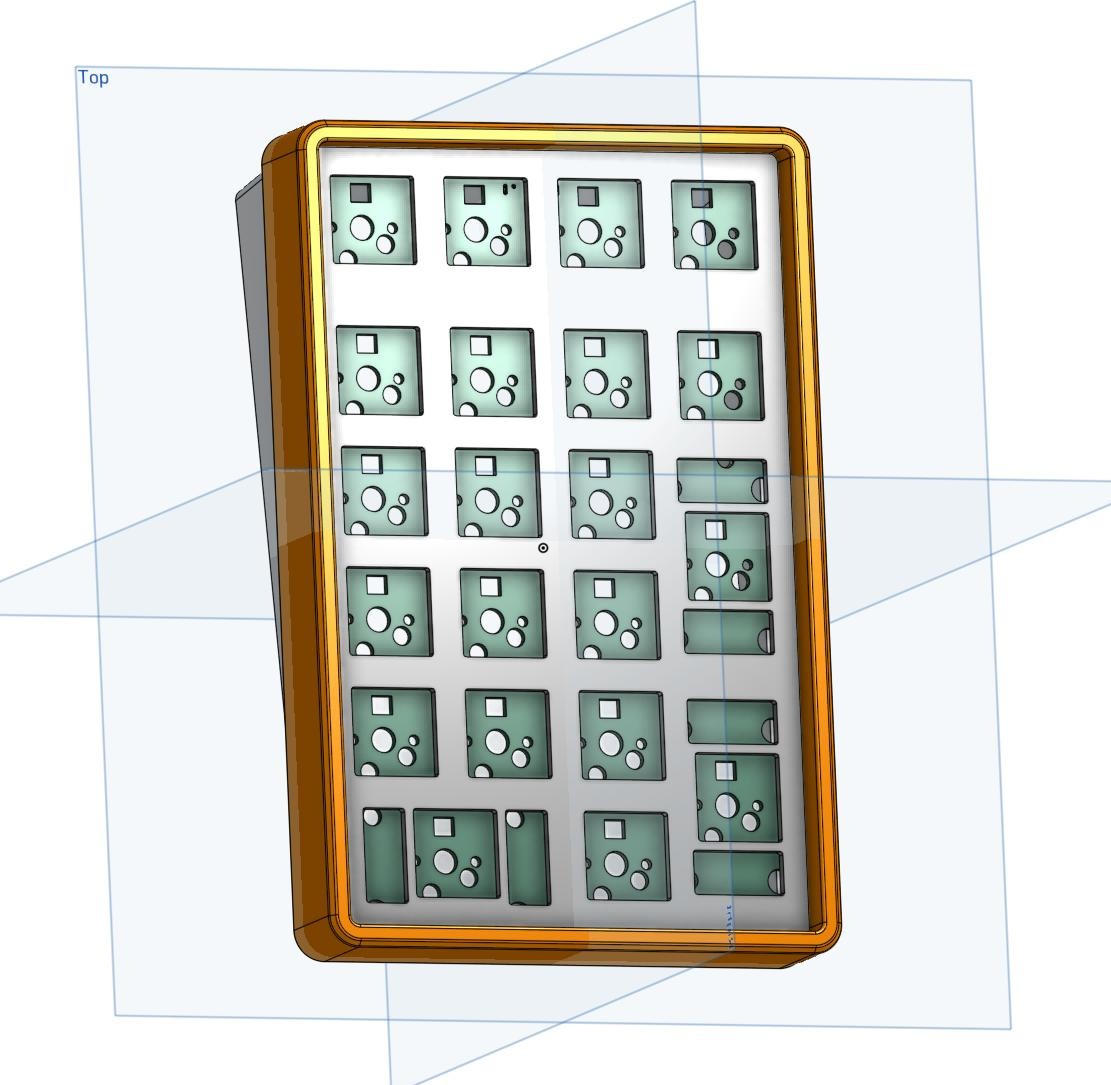
Case
For the case, I exported the PCB from KiCAD, imported into OnShape, and designed around it. Screw holes were also added.
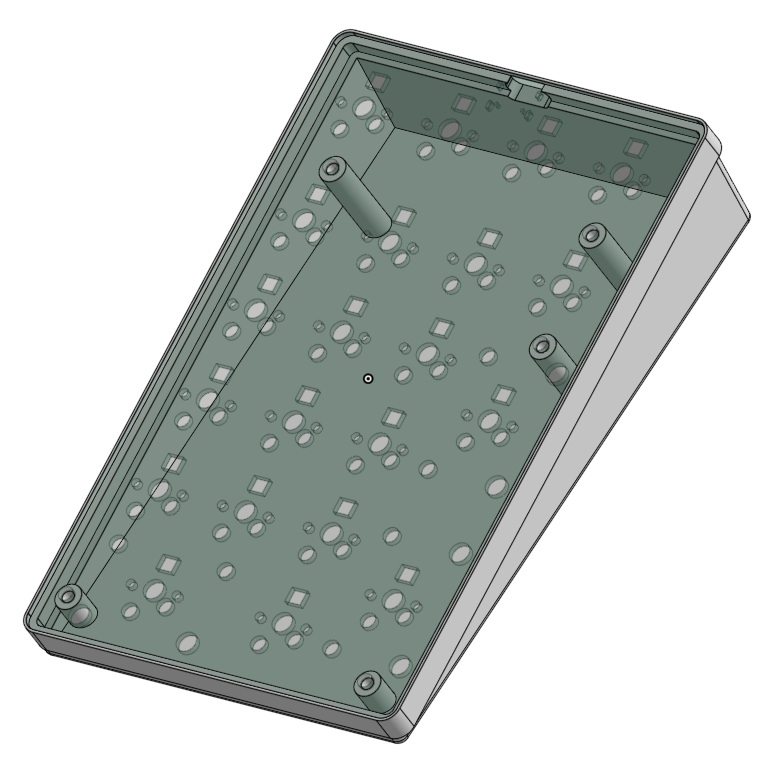
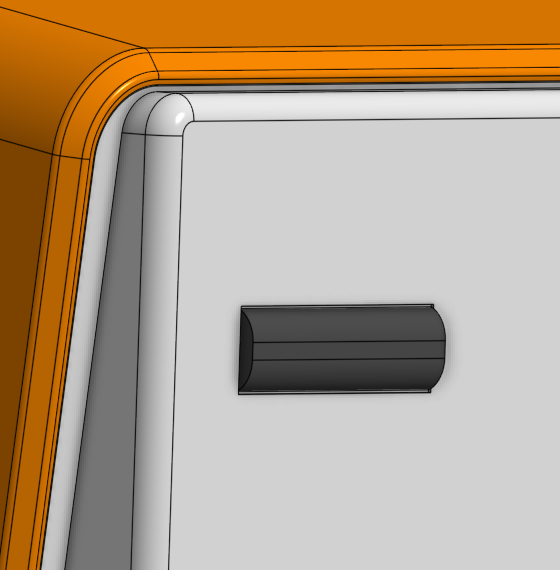
The bottom also has feet, which were printed with TPU filament for grip.
The plate was made thicker and some walls were added to reduce the LEDs diffusing into nearby keys. The notches towards the top is to make space for the screw heads.

And finally, the top part would press-fit over the top, securing everything and providing a wall around the key switches.
All the extra prints from the first photo were for changing around different dimensions, testing fits and seeing which height and angle "felt right".
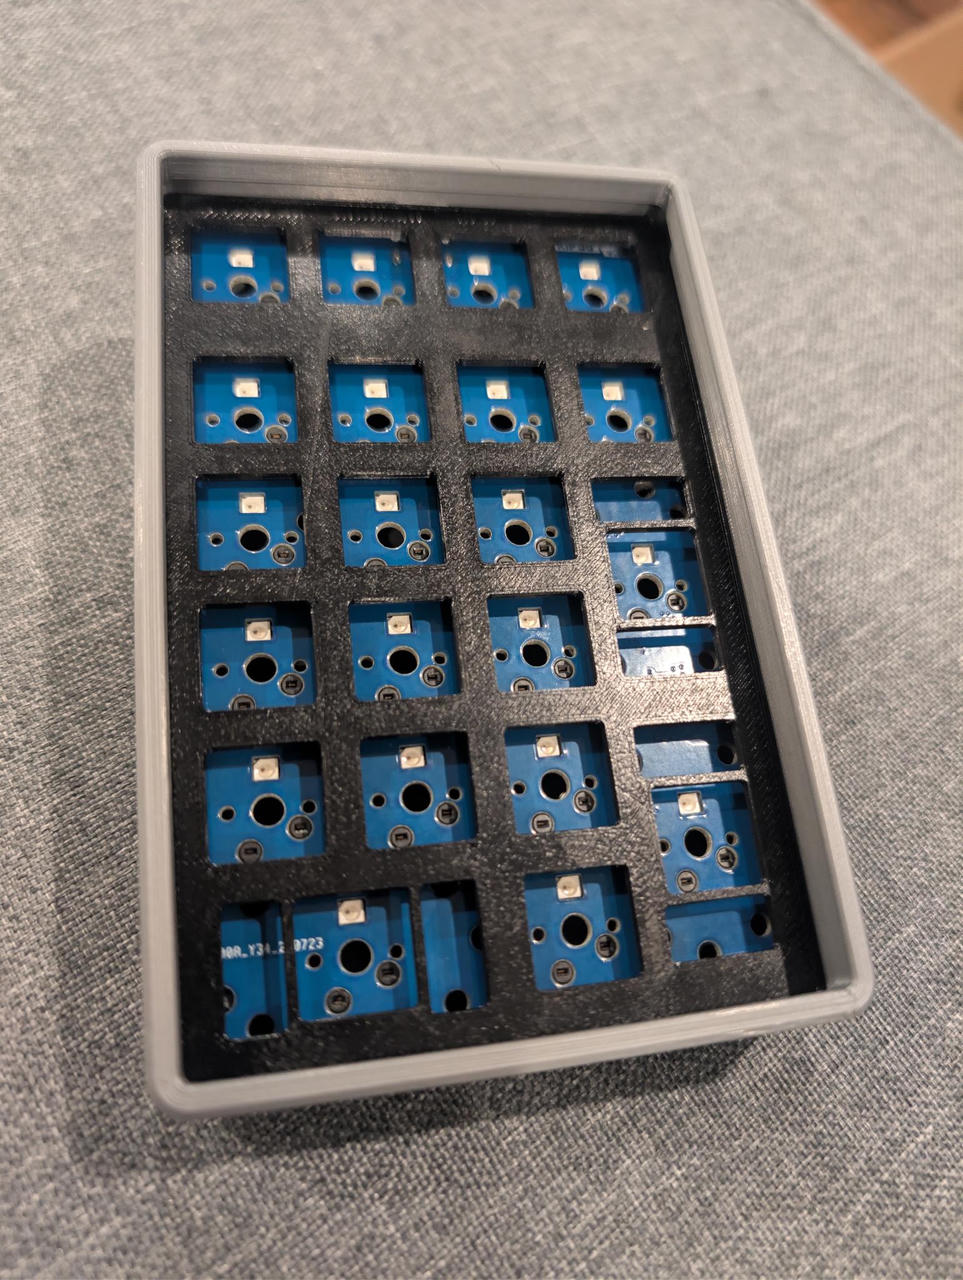
Version 3.1
This version just fixed the LED connections.
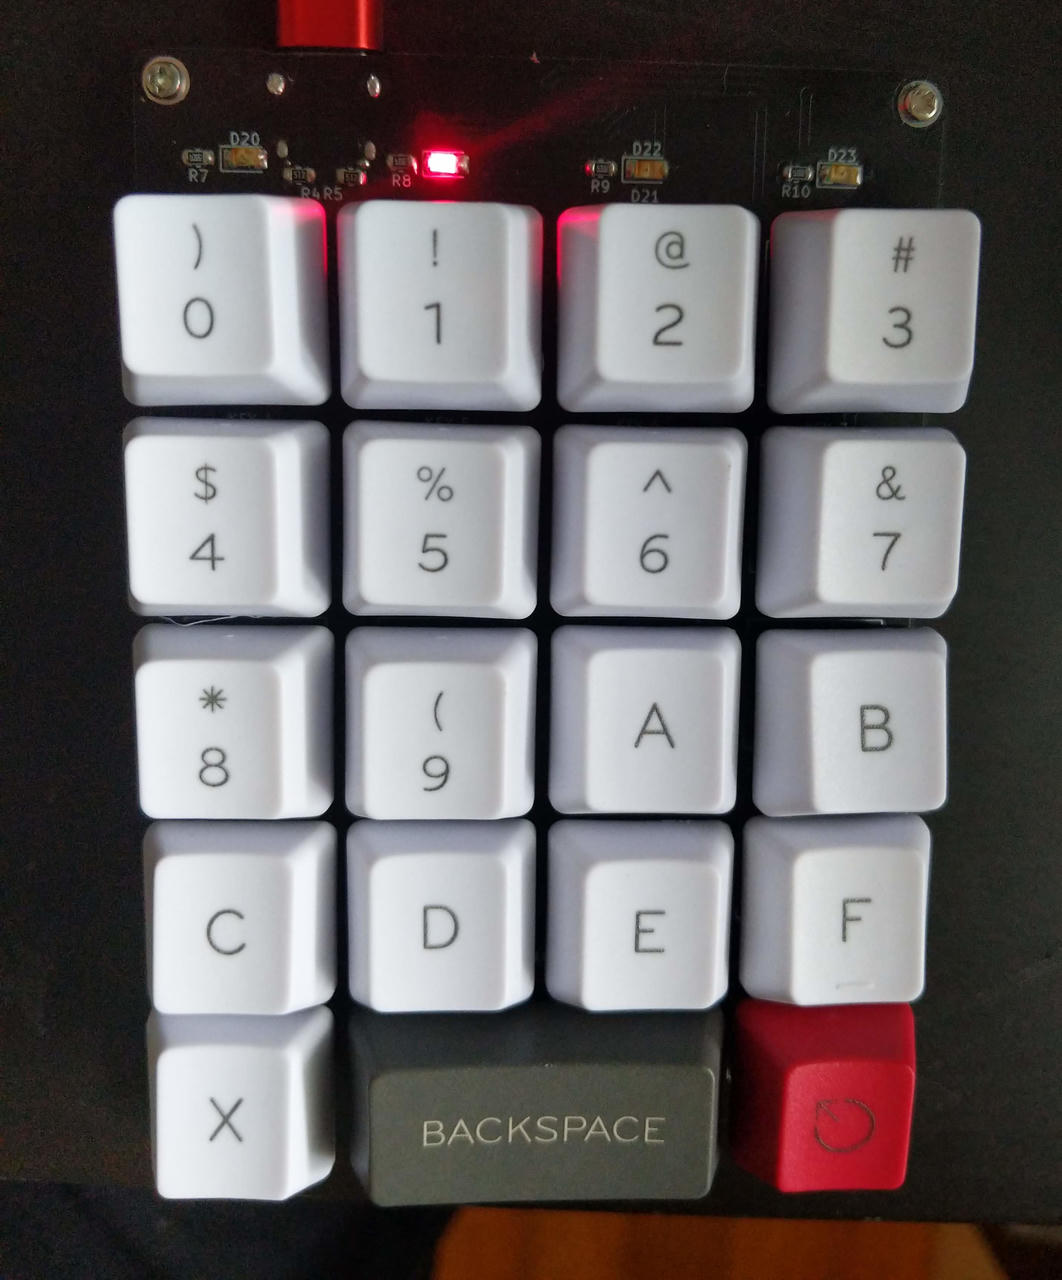
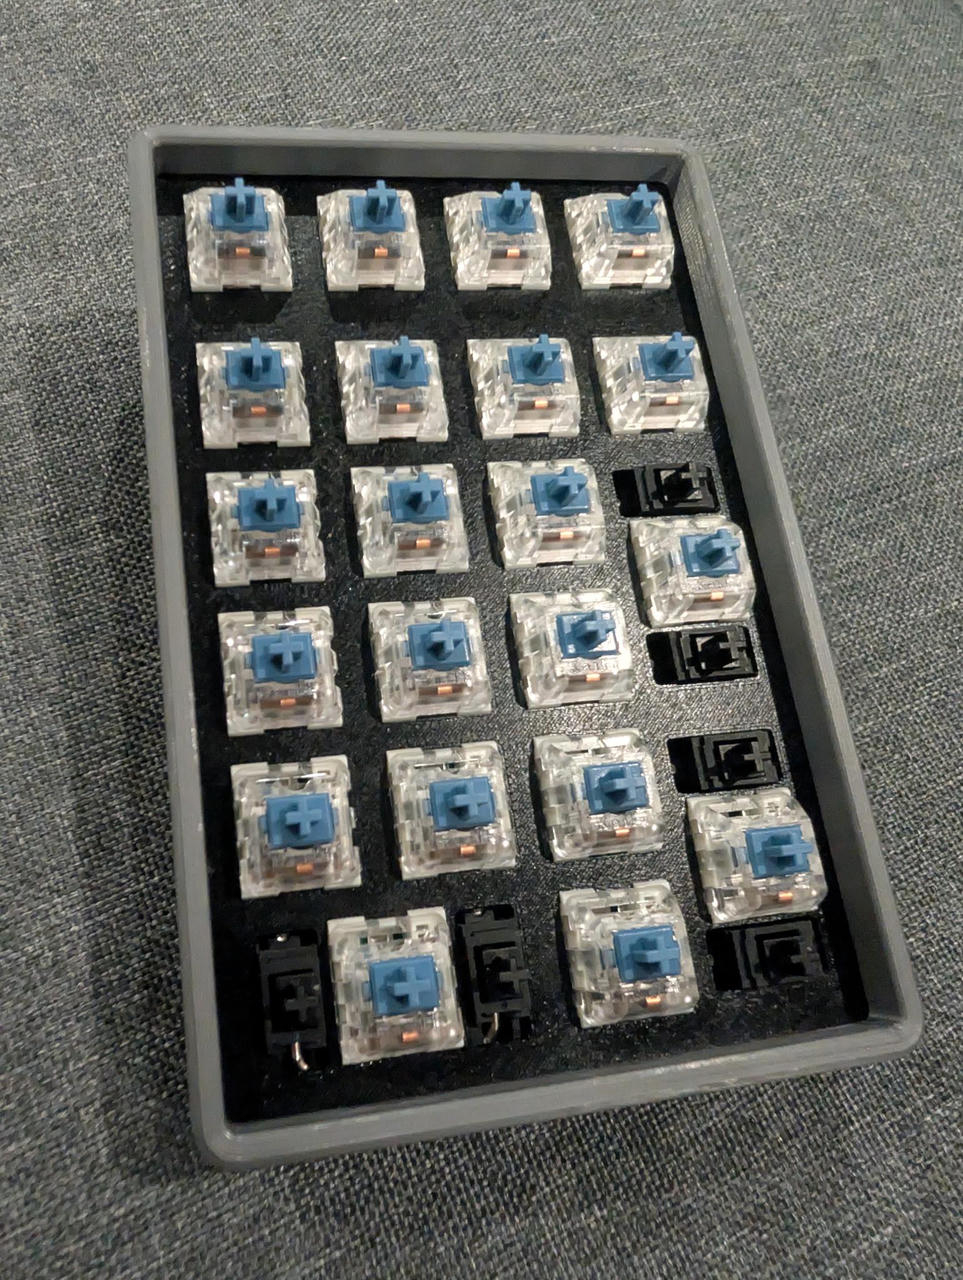
Inserted key switches, as well as key stabilizers for the longer keys.
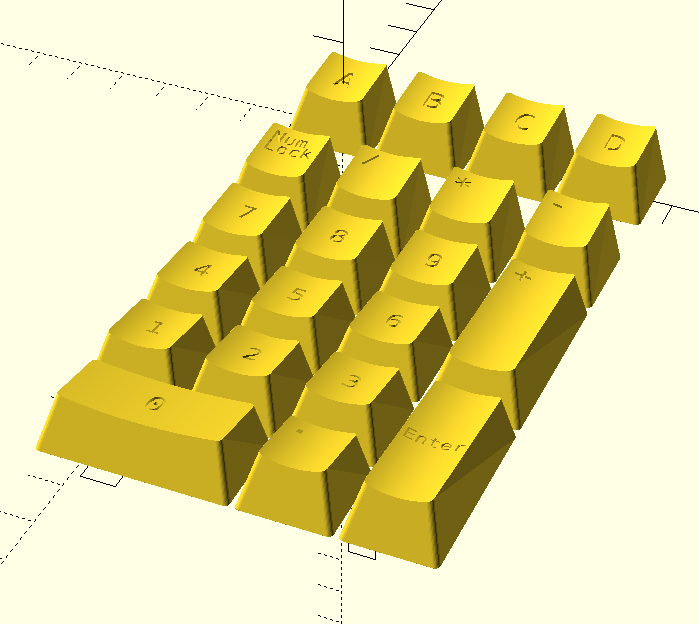
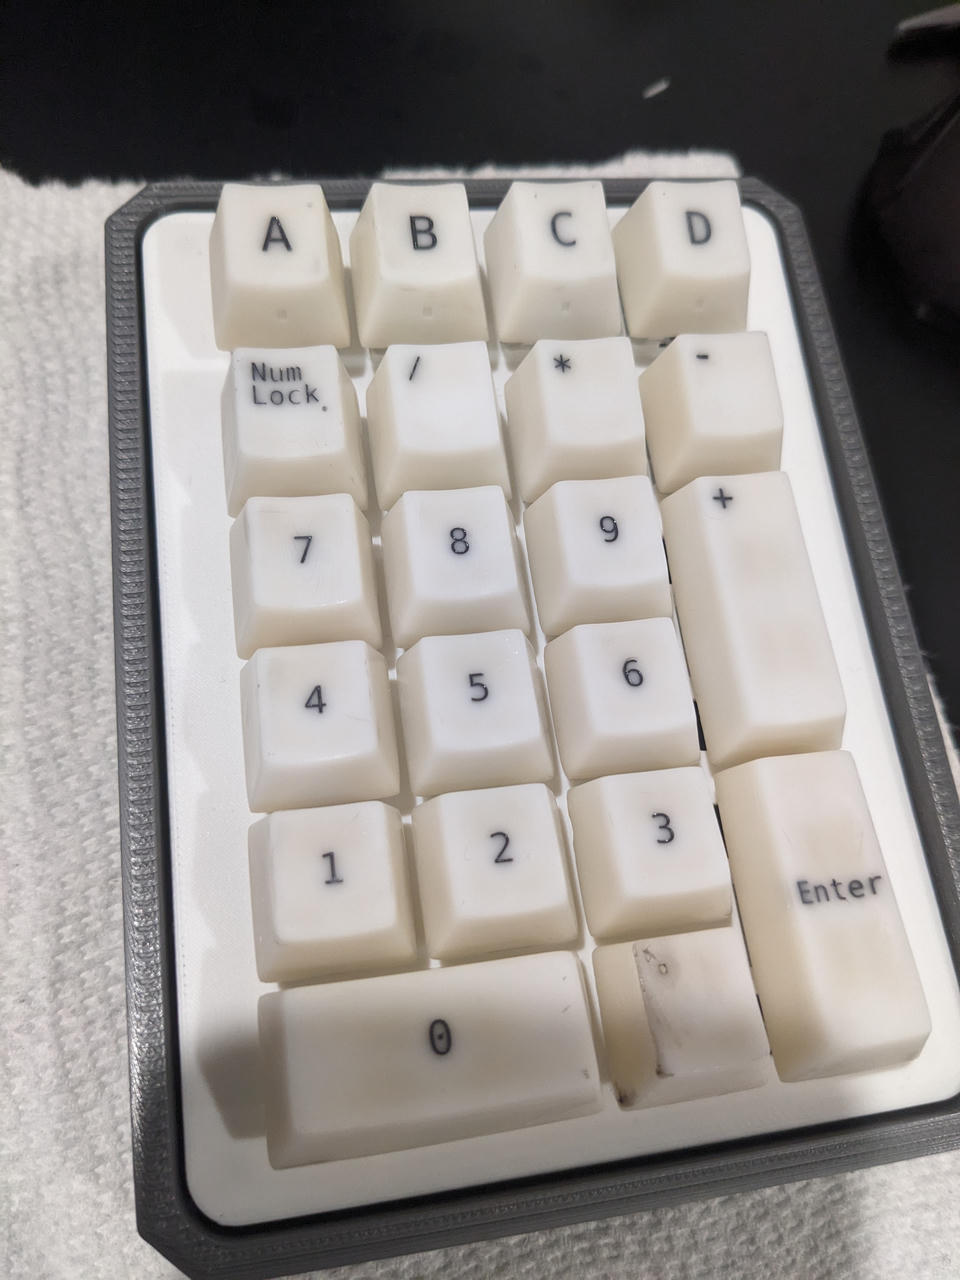
Keycaps
Keycaps were a big part of this project too.
I used the KeyV2 library to generate the 3D models.
Ideally, I would've loved to make my own double-shot keycaps, and I almost bought an injection molding machine... but that's a lot of $$$ for something I would use not too often. (Technically, I did buy one. And then cancelled it a few days later before it shipped. You can find some cheap (cheap for an injection molding machine), smaller scale machines on aliexpress and eBay.)
I tried printing them on my Prusa MK3. They came out okay, but I really didn't love how it came out.
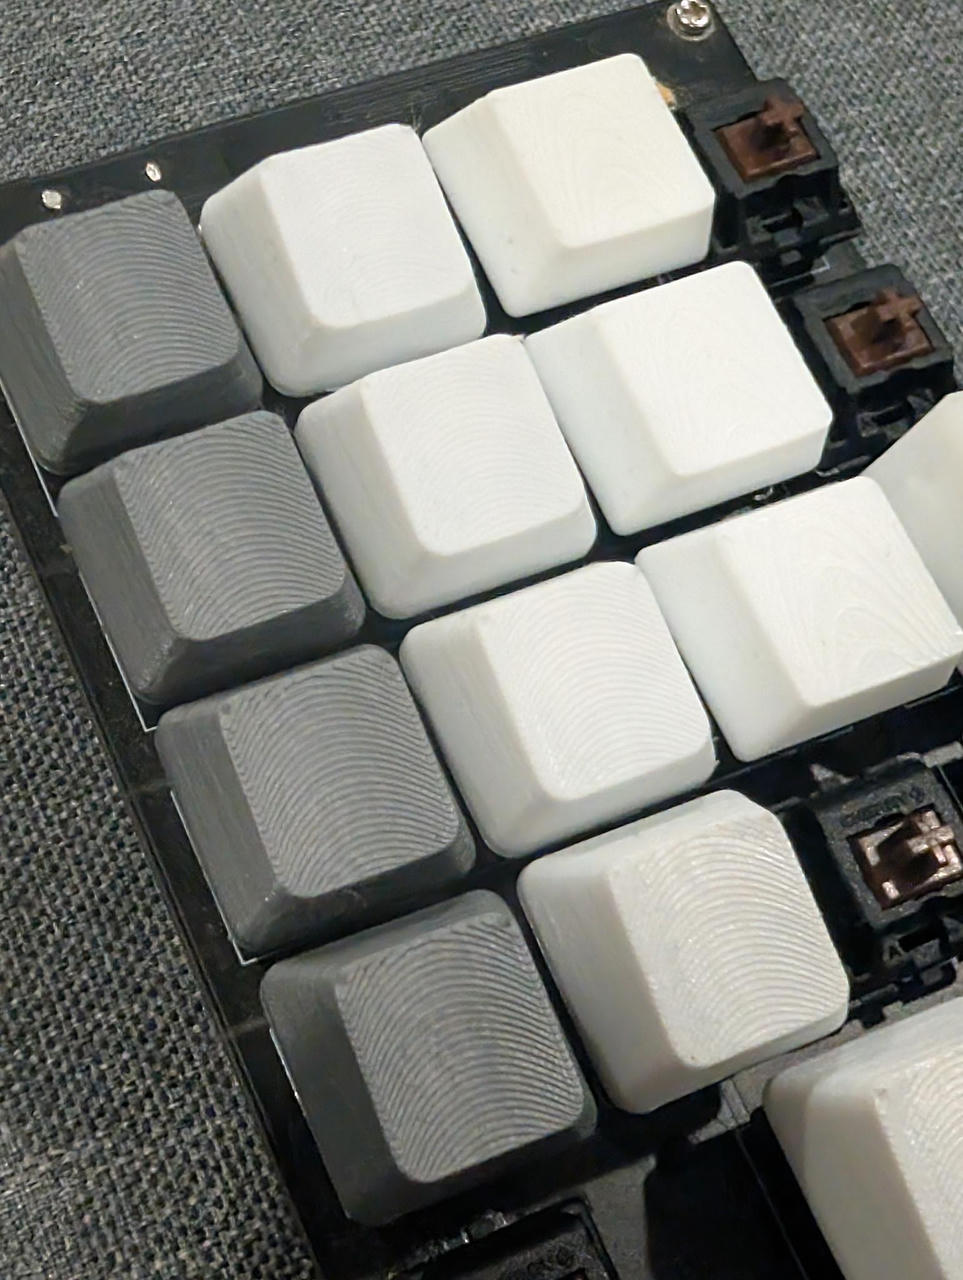
You can feel the layer lines, and they are pretty visible. Also, they are not very translucent, limiting the amount of light being passed through the keycaps.
For the key labels, I was thinking maybe trying dye sublimation, but the heat would just melt the keys, so that's a no-go.
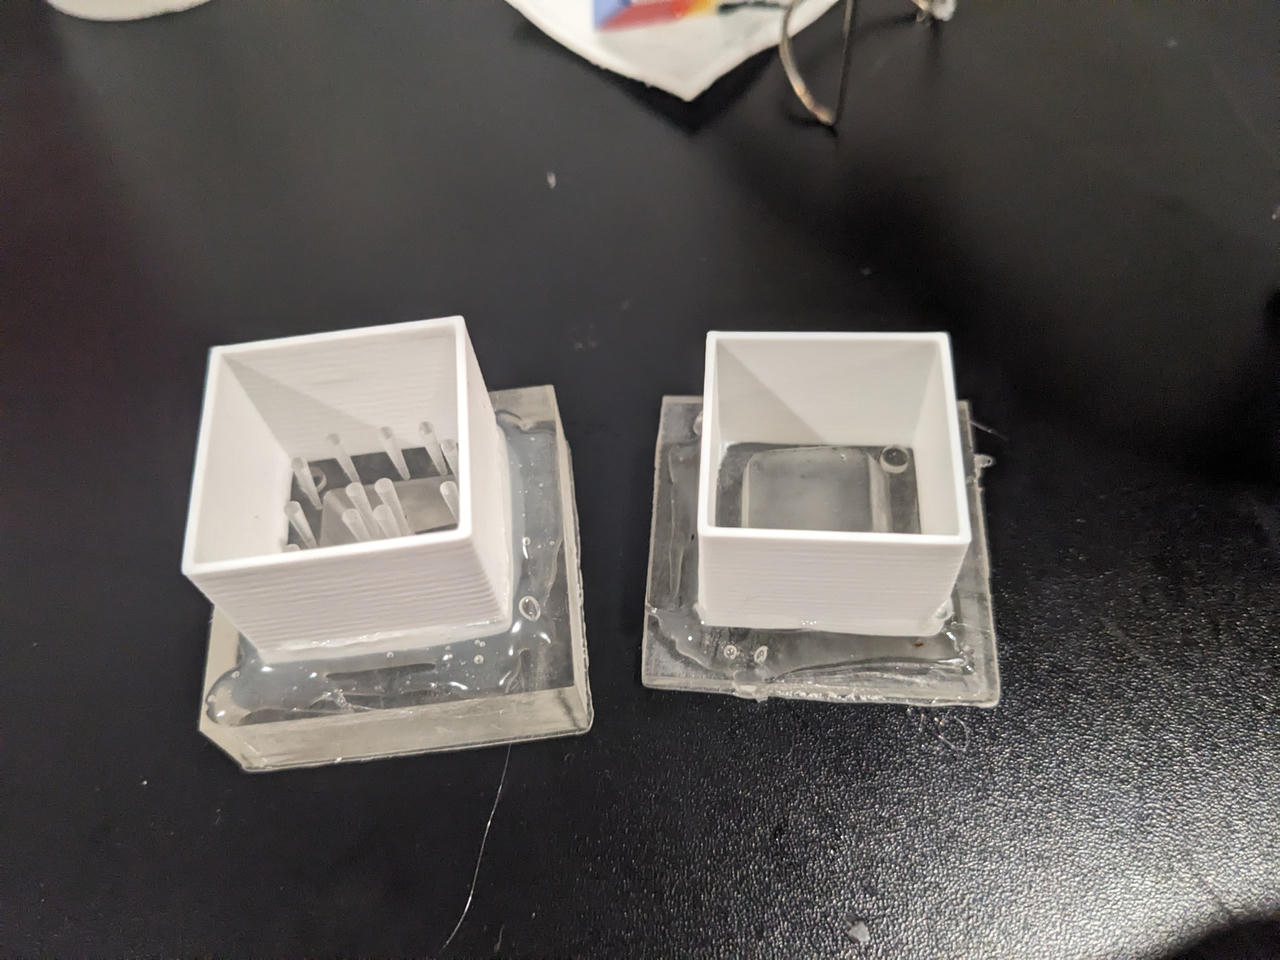
Another method I attempted was to print them in resin using a SLA printer, make silicone molds, and then cast it with some polyurethane resin.
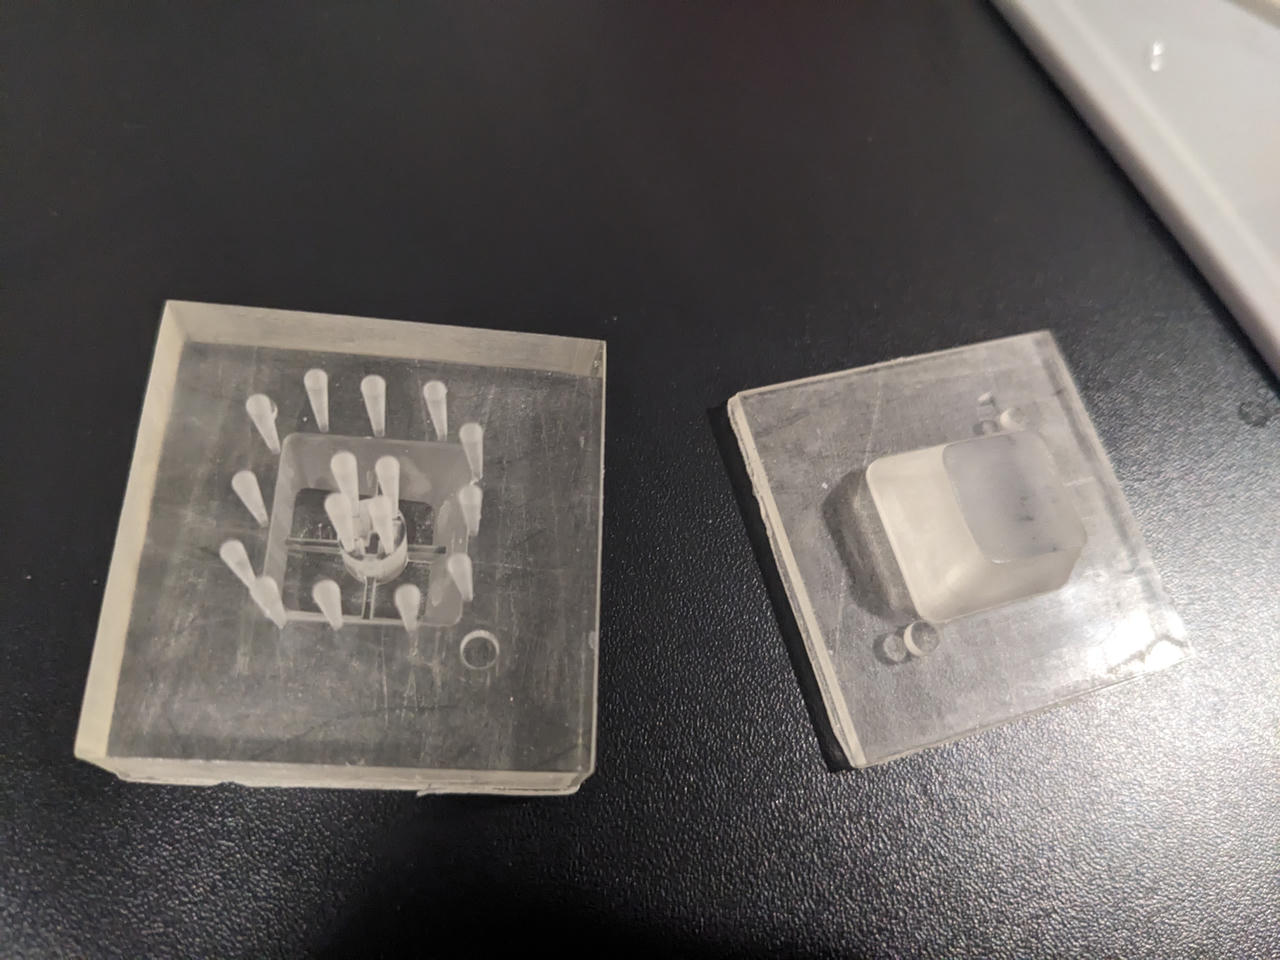
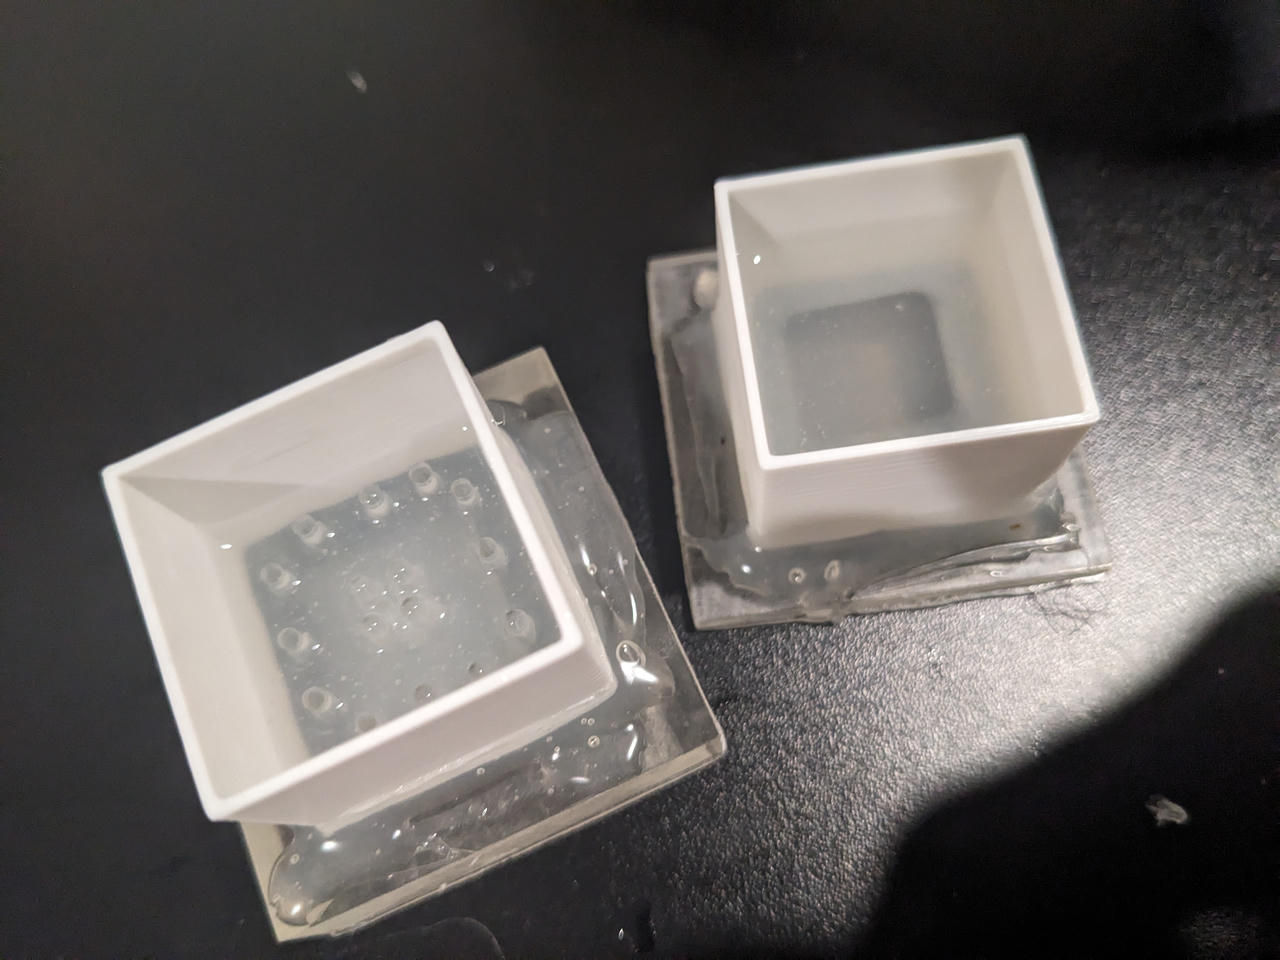
The issues with this approach were:
- The parts and their features were small, so it was hard to get a good full fill, even with a vacuum/pressure chamber. The cured silicone would come out with some parts missing, or, they would rip as I pulled it off the printed mold-mold.
- Same thing would happen for casting the actual part with plastic.
- Polyurethan would also melt with the temperatures needed to do dye sublimation (unless maybe using a nicer, more expensive plastic?).
- And most importantly, the silicone would not fully cure!
This was something I did not know about. Most 3D resin cannot be used with most of the regular silicone mixes. Something with the combination of the chemicals cause what's called "cure inhibition". While the outsides of the mold cure solid(-ish), the area where the silicone mix touched the 3D printed part (SLA printed resin), it would just stay goopy (and sticky).
To prevent this silicone cure inhibition, I would have to either (1) buy special 3D print resin made for this purpose, (2) buy special silicone mix made for this purpose, (3) both, or (4) spray/coat the printed part before pouring the mold.
I did not want to buy more (and more expensive) stuff. And coating it somehow (maybe non-stick or paint) might work, but it will also make the 3D printed part slightly larger (the coating thickness) and therefore make the mold slightly smaller, resulting in slightly larger part (It also sounded like extra work).
So I just used the resin printed part itself. In the rendering of the keycaps, you might notice that the labels are "inset(?)". Like, I created wells. I extruded the letters/numbers inwards. I did this on purpose so that I can just fill that gap with black plastic resin and sand it down for a smooth finish.
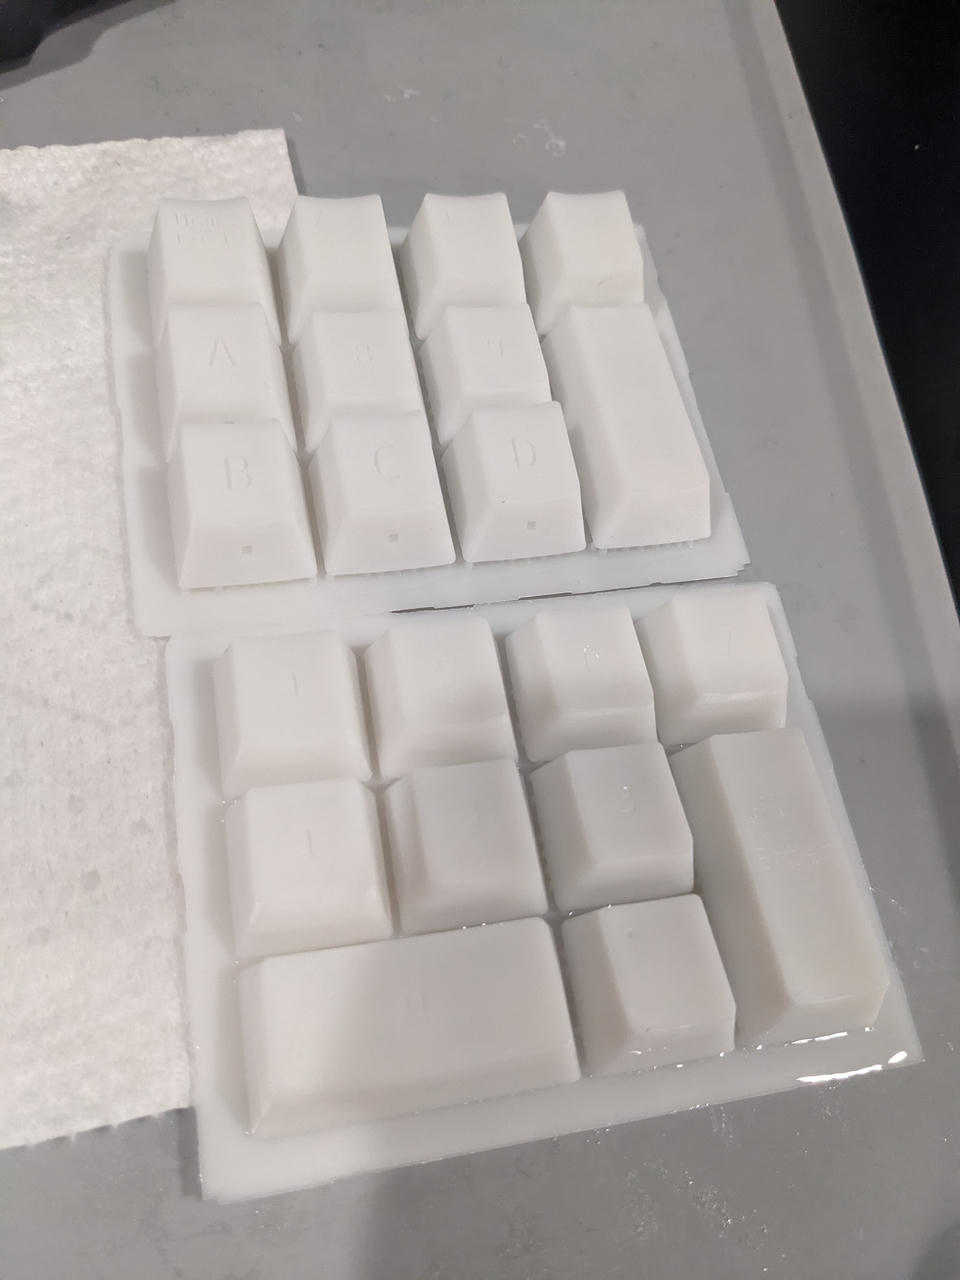
So that's how I made the key caps.
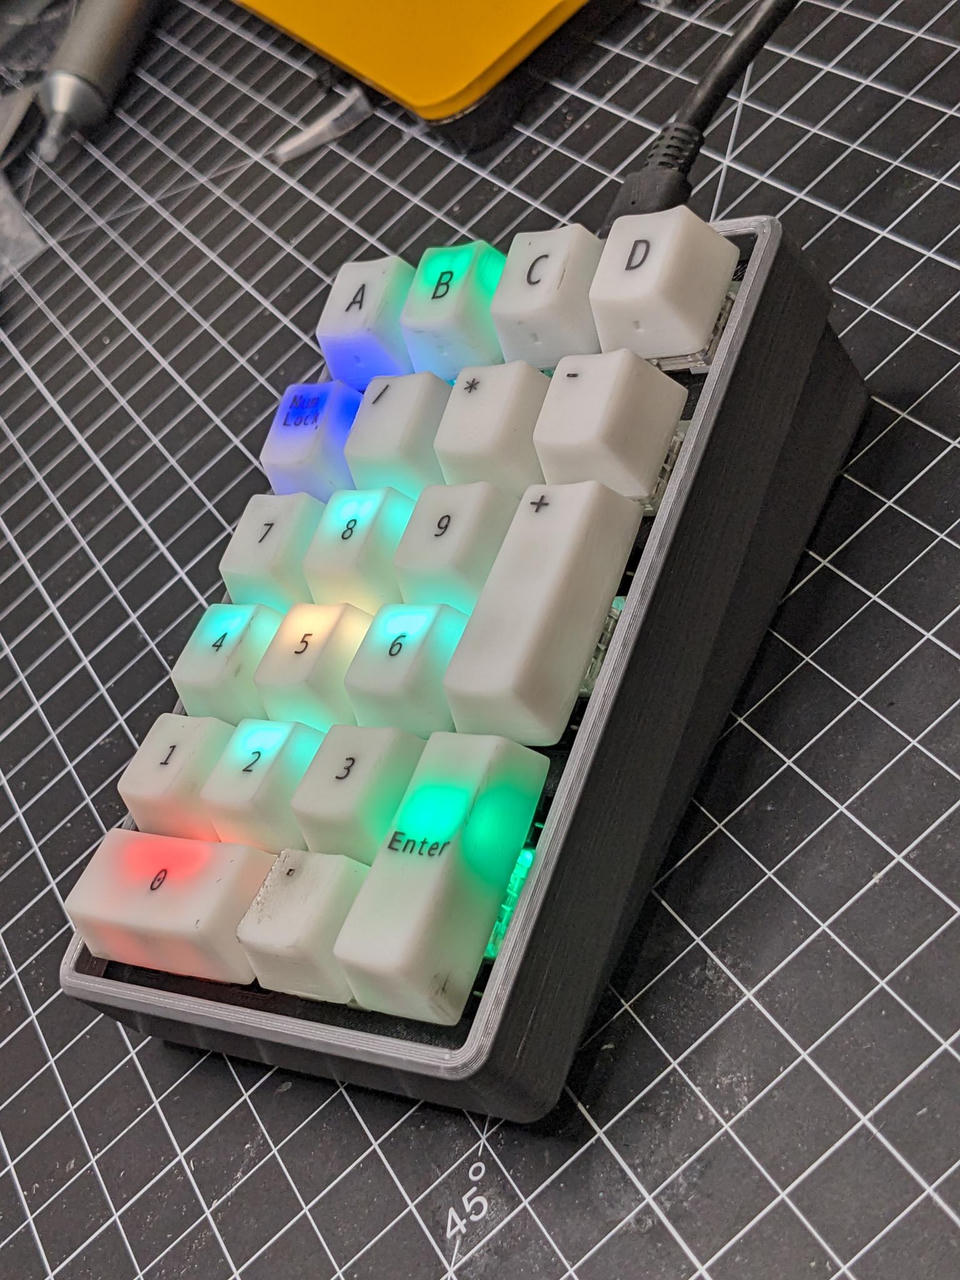
Final Product
With all that set, the final version looks like this:
Firmware
I just used QMK and added a config for this custom keyboard. I've also added a config for Via, so that it can be reprogrammed without having to download or recompile the firmware.
The board specific QMK configs, along with all the schematics, board designs, and 3D parts, can be found over at this repo: https://github.com/awkwardbunny/KiPad
Thanks for reading.
73,
-B